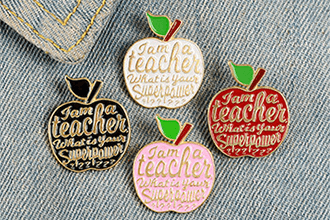
If you have a great idea and want to make a pin.How to do it?Most people think making their own pins is a long and complicated process.It can't be complicated.The usual turnaround time is 1-3 weeks.So how do you start making your own enamel pins?
We simply break down the production process into six steps, as follows:
Prepare your artwork
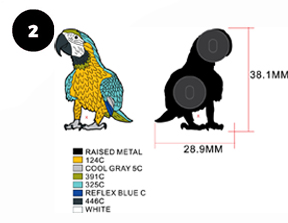
In order to start production, the pin factory asks you to provide vector files of the design you want to produce.You can draw and color your idea sketches on a piece of white paper, or directly inform our designers of your design ideas, and they will give you an excellent artwork according to your ideas.
Some design-related tips I recommend to anyone starting out are:
To simplify the:Measuring about 1-2 inches, the pin design is a small canvas, so you can use it to convey the lines and details of your pin design, and when your design is simple enough, the better.
Use bold lines and strong colors:Pins are small, so thin lines and pastel colors tend not to stick out when viewed from a distance.So we suggest using bold lines and bright colors instead!
To avoid the shadow:The colors in the pushpins are separated only by lines, which means there are no shadows between the colors.By not including shadows in the pin design, you can save yourself and the factory some production time.
Decide what your enamel pin is made of
Our custom pins can be made from a variety of materials, but most pin manufacturers stick to two traditional formats.Hard enamel and soft enamel pins.What's the difference?
Hard enamel pin:Their defining features are thin wires separating each color and a smooth, hard enamel finish.Made from die-cast iron metal, they are heated to high temperatures and then polished to form a smooth surface, which usually gives them a high-quality, durable feel.
Soft enamel pin:The defining feature is its textured stitching surface, which allows for more detail and a slightly lower cost.Made from die-cast iron metal, electroplated and optional epoxy coating, this usually makes them feel thinner compared to hard enamel pins.
They are tried-and-true materials, so no matter which material you choose, you can make an outstanding pin.Choose whatever style best conveys your design!
Determine the size of the enamel pin you want
Now that you have your artwork and pin material ready, how do you choose pin size?Or what size fits your design better?These all need to be considered before you make them!
Smaller pins are typically between 0.75 and 1.25 inches.This makes them more portable and easier to wear, and because they use less material, the cost of a unit price pin is usually lower.The disadvantage of smaller pins is that they are usually designed to not allow for much detail.
Larger pins are above 1.25 inches, allowing for more detailed design because you're using larger sizes, but their size also limits where they can be worn, and larger pins are clearly not suitable for wearing on the chest.You probably won't see many people wearing 2-inch pins on their lapels.
If you're on a budget and have a simple design, a smaller pin might be a better choice for you.Pin prices are usually determined by pin size, so they can be cheaper.If you want to create a very detailed pushpin and don't mind paying a higher price, a larger pushpin is the right choice for you.
Decide how many enamel pins you want to produce
Before starting this step, make sure you have decided on the material and pin size.It's time to choose how many stitches you want to produce, it's easy.
Some manufacturers do not have a minimum order quantity, for example, we do not have a minimum order quantity.But we still suggest you to order more, because the price of unit price pin will be lower.If you are selling customized pins, we do not recommend ordering too many at a time. You can order part of them first, and if the sales effect is good, you can continue to order more.This option may be better for your financial situation.
Decide how many pins you want your enamel pin to have
A PIN-back is a needle-like mechanism, usually located at the back of a pin, used to temporarily secure it to a surface.When it comes to pin buckles, there's only one thing you need to be clear about:Always place two pins on all pins!Why is that?Using only one pin will make your pin wobble wherever you place it, and it's more likely to fall off and get lost.Losing a beloved pin can be a terrible thing, so we should be prepared to lose it.
Choose a reliable pin manufacturer
In most cases, your production and communication process with the manufacturer will look like this:You inform our staff of your design artwork and your customization ideas.They will provide you with cost estimates and final artwork for your approval.Once the artwork and costs are approved by you, you will need to pay a custom fee.They manufacture pins for you within the turnaround time they promised.After the pin production is complete, they will give you a tracking number of the shipment and then wait a few days for you to receive your custom pin.


